
I've reviewed installation records, manufacturer specs, and case files from the licensed contractors in our Virginia directory, and I've walked basements with the pros while they diagnosed exactly why a given house was taking on water. Almost every wet basement I've seen traced back to one of a handful of causes, and almost every good fix follows the same order — cheapest and least invasive first, expensive and disruptive only when the cheap fixes don't solve it. That's the order I'm laying out here.
If you only take one thing from this article, take this: waterproofing is not a single product you buy. It's a sequence of decisions, and skipping the first one — figuring out where the water is actually coming from — is the single most expensive mistake homeowners make, because it leads to buying the wrong fix.
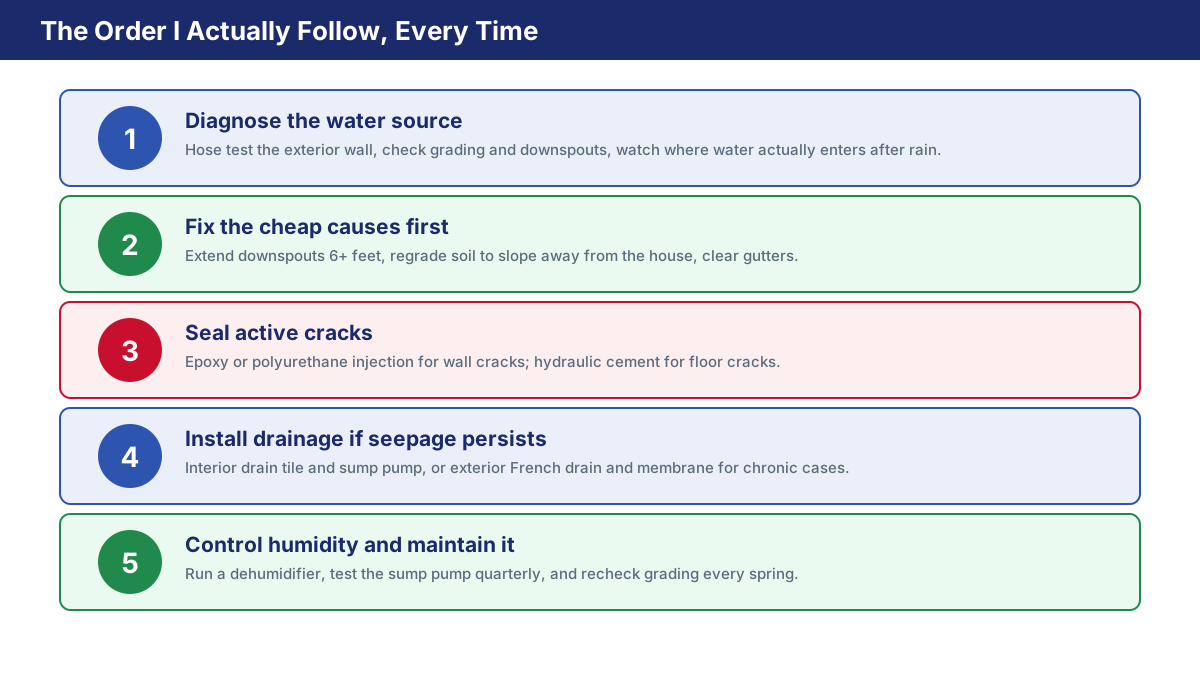
Step 1: Find Out Where the Water Is Actually Coming From
Before you spend a dollar, spend an hour watching your basement during and right after a hard rain. Note exactly where water appears — a specific wall, the cove joint where the wall meets the floor, a window well, a floor drain, or a crack. That single observation narrows your problem more than anything else you'll do.
If nothing is obviously visible but you're smelling must or seeing white chalky efflorescence on the walls, do a hose test: run a garden hose against a small section of the exterior foundation wall for 15 to 20 minutes while someone watches the corresponding interior wall for damp spots. Work through sections of the wall systematically rather than spraying the whole foundation at once, so you can pin down exactly where water gets through. A basic moisture meter (inexpensive at any hardware store) helps you tell the difference between surface dampness from humidity and actual water intrusion inside the wall material.
This diagnosis step is also where you decide whether you're dealing with a waterproofing problem at all, or a structural one. Stair-step cracks in block walls, a wall that's visibly bowing inward, or doors and windows that have started sticking are signs of foundation movement, not just water intrusion — that's a job for a foundation repair specialist, and waterproofing alone won't fix it.
Step 2: Fix the Free and Cheap Causes First
In my experience looking at contractor diagnostics, a surprising share of "basement waterproofing" problems are actually surface-water problems that never needed excavation or injection at all. Before you consider anything more invasive:
- Extend your downspouts. Water discharging within a foot or two of the foundation is one of the most common causes of basement seepage I've seen flagged in inspection notes. Extend downspouts at least 6 feet away from the house, further if your yard is flat.
- Regrade the soil. The rule of thumb most contractors use is a minimum 6-inch drop in grade over the first 10 feet away from the foundation, so rainwater runs away from the house instead of pooling against it.
- Clean your gutters. Clogged gutters overflow right at the foundation line, defeating any downspout extension you've installed.
- Check window wells. Wells without covers or proper drainage gravel at the base fill like a bathtub during heavy rain and can send water straight through basement windows.
These fixes cost very little and take an afternoon. I'd always do them first and then watch through the next hard rain before spending anything on drainage systems or excavation — you may find the problem is already solved.
Step 3: Seal Any Active Cracks
If water is entering through a specific crack rather than general wall seepage, sealing it directly is usually the next cheapest fix. Wall cracks are typically sealed with epoxy or polyurethane injection: polyurethane expands as it cures and works well for active, weeping cracks, while epoxy creates a rigid structural bond better suited to cracks that aren't actively leaking. Floor cracks are usually filled with hydraulic cement, which expands slightly as it sets and can be applied even against a small amount of active water.
I go into more depth on identifying structural versus non-structural cracks and the exact injection process in how to repair basement wall and floor cracks. If a crack is more than hairline-wide, or the wall around it is bowing, that's a structural issue that needs an engineer or foundation specialist before — not instead of — any waterproofing work.
Step 4: Choose Between Interior and Exterior Waterproofing
If the cheap fixes and crack sealing don't solve it — meaning you still get seepage through the walls or floor themselves — you're choosing between two fundamentally different approaches.
Interior waterproofing manages water after it has already reached the wall. A contractor cuts a channel around the interior perimeter of the basement floor, installs perforated drain tile in gravel, and routes it to a sump pump that ejects the water outside. It's less invasive (no excavation), generally faster to install, and typically costs $3,000 to $9,000. The tradeoff is that water is still entering the wall material itself; the system just catches and removes it before it reaches your living space.
Exterior waterproofing stops water before it ever reaches the wall. This means excavating down to the footing, applying a waterproof membrane (often with dimple board to encourage drainage), and typically installing an exterior French drain at the base of the wall. It's significantly more disruptive to your landscaping and typically runs $8,000 to $15,000 or more, but it addresses the water at the source rather than managing it after the fact.
I cover exactly how these systems work together, including the vapor barriers and dehumidification layer, in how basement waterproofing works. If your plan involves an exterior perimeter drain specifically, I wrote a full step-by-step walkthrough of that piece in how to install a French drain.
Step 5: Install a Sump Pump With Battery Backup
If you're installing interior drain tile, or if you already have a sump pit that's working overtime, the pump itself deserves real attention rather than an afterthought. A primary pump handles day-to-day water, but the worst-case scenario for a basement is a major storm that both fills your sump pit and knocks out your power at the same time — exactly when you need the pump most. A battery backup pump kicks in automatically when that happens. Installed sump pump systems, including a battery backup, typically run $1,000 to $3,500.
Step 6: Control Humidity Once the Water Is Handled
Liquid water isn't the only problem. Even a basement with no active leaks can sit at high enough humidity to grow mold and cause condensation, rust, and musty odors. Running a dehumidifier sized to your square footage to keep relative humidity under roughly 55% protects your air quality and everything stored down there, and it's the step people skip most often because the basement looks dry.
What I'd DIY vs. What I'd Hire a Pro For
Being honest about where the line sits saves both money and mistakes:
- Reasonable to DIY: downspout extensions, regrading soil, gutter cleaning, window well covers, running a dehumidifier, and an exterior French drain on flat ground with no sign of a high water table (I walk through that project in detail in how to install a French drain).
- Hire a licensed contractor: excavation and exterior membrane installation, structural crack injection, interior drain tile that requires breaking the concrete slab, sump pump electrical work, and anything at all involving a bowing wall or visible foundation movement.
You can compare licensed waterproofing contractors covering your specific area on our interactive searchmap, filtered by service and ZIP code, or check contractor reviews before you decide who to call.
What Basement Waterproofing Costs in Virginia
These are the statewide ranges I see most consistently across the contractors in our directory. They're planning numbers, not a quote — the only accurate price comes from an on-site inspection, which you can request free through our job request form.
- Interior drainage system: $3,000–$9,000
- Exterior waterproofing: $8,000–$15,000+
- Sump pump installation (with battery backup): $1,000–$3,500
- Crack injection: $500–$1,500 per crack
- Exterior French drain (standalone): $2,000–$6,500
Mistakes That Cost People the Most Money
- Buying a system before diagnosing the source. An interior drain tile system won't help if your real problem is a downspout dumping water at the foundation.
- Skipping the battery backup. Sump pumps fail at the worst possible time — during the storm that knocked out the power.
- Patching the symptom, not the cause. Painting over a damp wall with waterproof paint looks like a fix for a season or two, then the moisture finds a new path.
- Ignoring a structural sign because water is the more obvious symptom. A bowing wall needs an engineer's eyes before it needs a waterproofing crew.
- Assuming one quote is the market rate. Get at least two written, itemized estimates for the same scope of work before you commit.
How Long Will This Actually Last?
Lifespan varies a lot by method — exterior membranes and interior drain systems can both last 20 to 50 years, while a sump pump's mechanical parts typically need replacement well before that. I break down realistic lifespans for every method, and what actually extends or shortens them, in how long basement waterproofing lasts.
Frequently Asked Questions
Can I waterproof a basement myself?
Partially, yes. Downspout extensions, regrading, gutter maintenance, and even a standalone exterior French drain on flat ground are reasonable DIY projects. Excavation with a membrane, structural crack injection, and interior drain tile that requires cutting concrete are jobs I'd leave to a licensed contractor.
How much does basement waterproofing cost in Virginia?
Interior drainage systems typically run $3,000–$9,000, exterior waterproofing $8,000–$15,000 or more, sump pump installation $1,000–$3,500, and crack injection $500–$1,500 per crack. Your exact cost depends on the scope of work an inspection reveals.
What's the difference between interior and exterior waterproofing?
Interior systems manage water after it reaches the wall, using drain tile and a sump pump to collect and remove it. Exterior systems stop water before it reaches the wall at all, using excavation, a waterproof membrane, and usually a French drain. Interior is less invasive and cheaper; exterior is more thorough and more expensive.
Do I need a permit to waterproof my basement in Virginia?
It depends on the scope and your locality. Surface fixes like regrading or downspout extensions typically don't require a permit. Excavation, structural work, or anything tying into a sump discharge or storm system more often does. Check with your local building department, or ask your contractor to confirm as part of the estimate — a licensed contractor should already know your jurisdiction's requirements.
How do I know if I need a sump pump?
If your basement takes on standing water, if you're installing an interior drain tile system, or if you already have a sump pit with an old or unreliable pump, you need one. Even homes without a current water problem often benefit from a sump pump with battery backup as insurance against a future storm.
Conclusion
A dry basement almost never comes down to one product. It comes down to working through the causes in order: find out where the water is actually coming from, fix the free and cheap causes first, seal what needs sealing, and only then decide between interior management and exterior prevention based on what the diagnosis actually showed you. Skip straight to buying a system before you've done that diagnosis, and you risk spending several thousand dollars solving the wrong problem. Follow the order, and most homes end up needing far less work — and far less money — than the worst-case scenario suggests. If you'd rather have a licensed Virginia contractor walk your basement and tell you exactly where you stand, that inspection is free through our job request form, with no obligation to hire anyone.